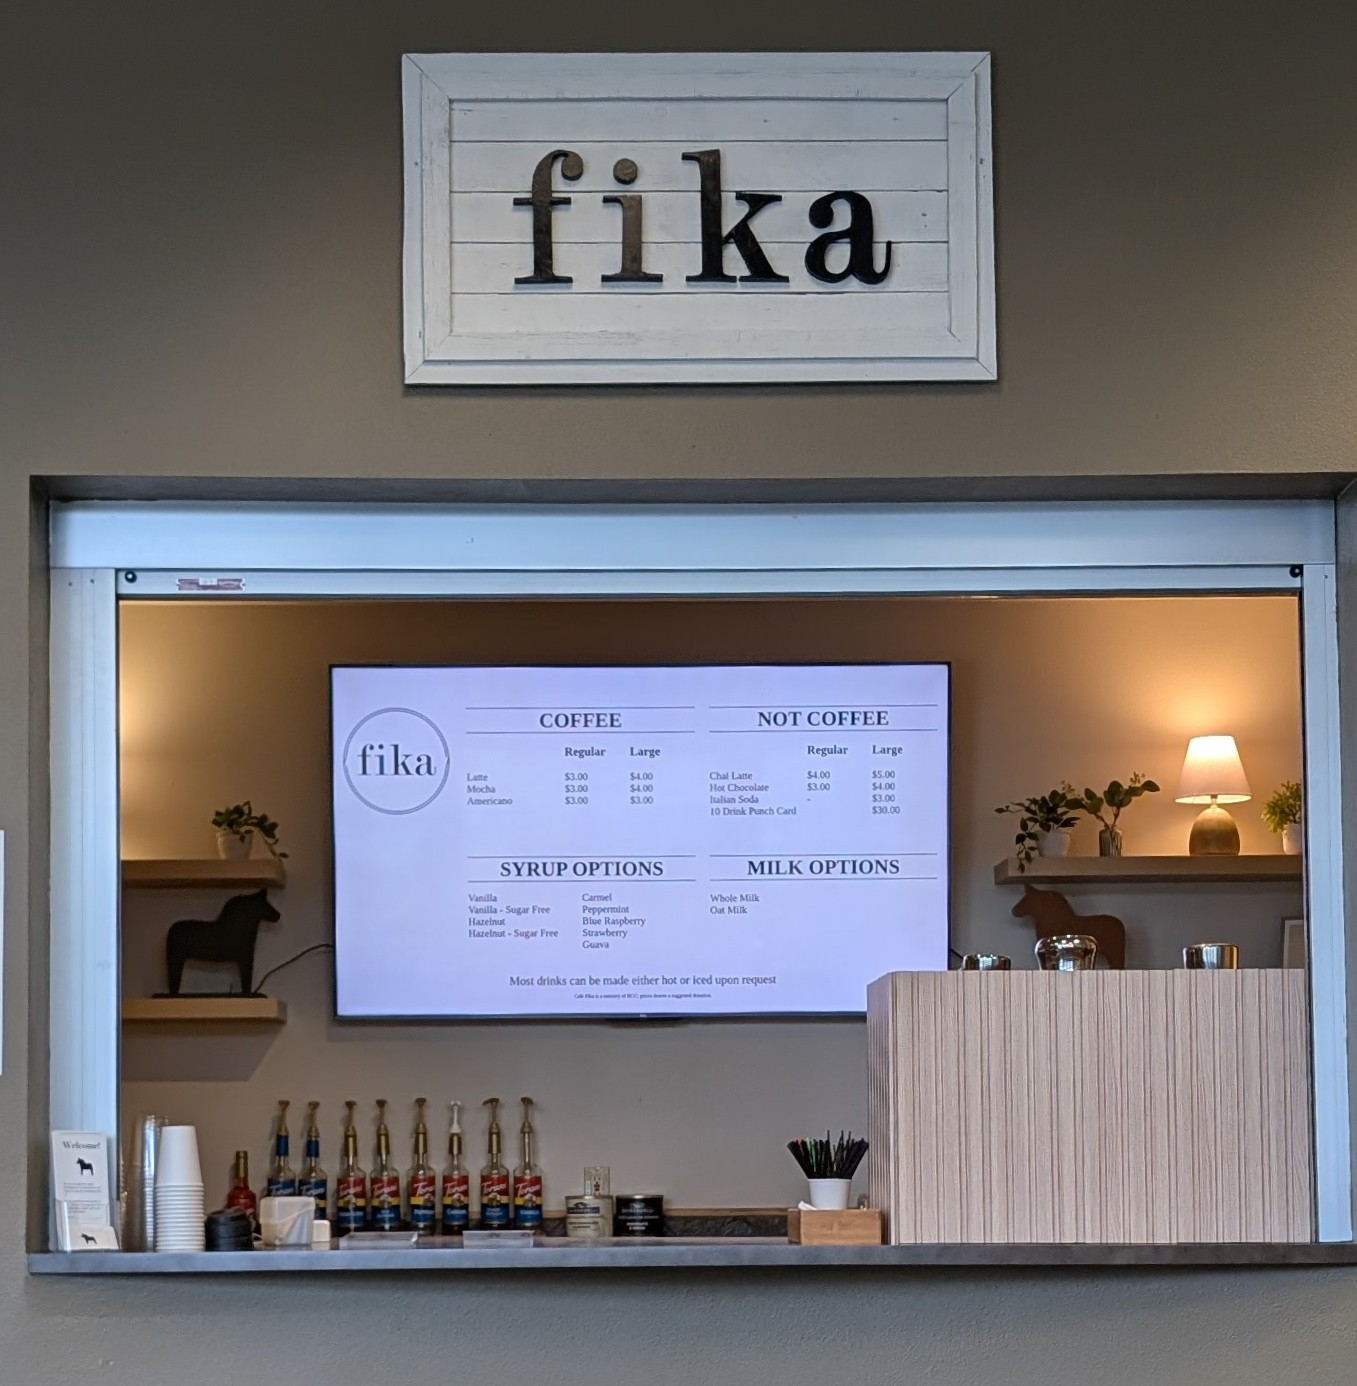
A digital menu board with a Raspberry Pie
September 14, 2024
4 minutes
Overview of the project
I’m a coffee nerd. I also love to use my passions and gifts to serve people. So I was pretty stoked when, a few years ago, I had the opportunity to volunteer at the coffee shop at my church.
Recently we did a small renovation and among the changes proposed was replacing the old menu board. It was a simple piece of printed cardboard and had very outdated prices, which didn’t matter all that much since the coffee shop is not-for-profit. More importantly, it didn’t accurately reflect the cafe’s updated product offerings.
I proposed creating a digital menu board so that we could update it (both the styling and the menu items) anytime we wanted.
It also helped that my day job was in the process of moving out of an office space and offered to donate this monster 75’’ TV. That made the decision pretty easy for all the stakeholders and I got the 👍.
So, the plan to was create a menu board that we could modify ad hoc. I may have used this as an excuse to build something I’d been thinking about for a while, and decided on a little bit of overkill.
I waned the content to be simple HTML/CSS managed by a git repository and I also wanted to be able to update the board anytime from anywhere, so I decided to use a Raspberry Pie zero 2 w, and serve the content in a browser in Kiosk mode, and also add a VPN so that I could connect to it remotely for updates.
Parts
- Raspberry Pie Zero 2 W (I opted to buy a CanaKit version because it comes with a case and power supply, memory card–everything you need to get rockin’. ) Buy it on Amazon .
- Any TV with HDMI. I happened to use one like this .
- An HDMI cable.
- Optional: Keyboard and mouse for the Pi to edit things locally.
Setup
Hardware
The Raspberry Pie Zero 2 W is a great little board, but it’s not really designed to run as a web server, and what’s more the menu is static HTML/CSS so I decided that it didn’t actually need to be served up, and that viewing it locally in a lightweight web browser would be sufficient.
I stared with Chrome in Kiosk mode, but everything just fell on it’s face, so I switched to midori which is more lightweight, and still offers a kiosk mode. So far it’s been great! Feel free to comment below if you have suggestions for improvements though.
Software
Here’s the GitHub Repository
Device configuration
-
Update swap file size
Using this article as a point of reference I increased the swap size to 2GB.
- edit
/etc/dphys-swapfile. Change CONF_SWAPSIZE from 100 to 2048, save and exit the file. - Setup swap with the new parameters:
sudo dphys-swapfile setup - Turn the swap on:
sudo dphys-swapfile swapon - reboot.
- edit
-
Update OS
Install tmux (so that you are not blocked) and then run updates:
sudo apt update
sudo apt install tmux
tmux new -s updates
now you’re in tmux.
sudo apt update && sudo apt upgrade -yNow you can ctl + b d to disconnect, and then carry on with the other steps while the system updates in the background
-
Wireguard
-
Install wireguard, if it is not already installed:
sudo apt update && sudo apt install wireguard -
If you get an error about resolvconf not being found, then install systemd-resolved:
sudo apt install systemd-resolved -
configure wireguard. I have a profile configured on my personal server. I scp’d it over and then symlined it to the /etc/wireguard dir. e.g.:
scp micah@rpi4:~/code/wireguard/wireguard-cli/configurations/clients/fika/wg0.conf pi@fika:~/ mkdir ~/.ssh/wireguard mv ~/wg0.conf ~/.ssh/wireguard/ sudo ln -s /home/pi/.ssh/wireguard/wg0.conf /etc/wireguard/ -
Bring up wireguard:
sudo wg-quick up wg0
-
-
Prevent the screen from sleeping
-
Add the unclutter package
sudo apt update && sudo apt install unclutter && sudo reboot nowThis will install the unclutter package and reboot the system. See the ChatGPT ref for an option to immediately hide the mouse, but I didn’t think that was a requirement in this setup, so I skipped that step.
-
Turn off screen blanking
Click on the raspberry pi logo in the top left > Preferences > Raspberry Pi Configuration > Display > Toggle Screen Blanking
-
-
Systemd service file to automate everything at startup
Created a service file in `/etc/systemd/system/fika-menu.service:
[Unit]
Description=Launch Web Browser at Startup
After=network.target

[Service]
User=pi
Environment=XAUTHORITY=/home/pi/.Xauthority
Environment=DISPLAY=:0
ExecStart=/usr/bin/midori -e Fullscreen '//home/pi/code/fika-menu/menu.html'
Restart=on-failure

[Install]
WantedBy=graphical.target
Make the file executable:
sudo chmod +x /etc/systemd/system/fika-menu.serviceTest that it works by running
sudo systemctl start fika-menu.service. Assuming that works, you can enable the service to auto start withsudo systemctl enable fika-menu.service.When making changes you may need to reload the systemctl daemon:
sudo systemctl daemon-reload.
Conclusion
This was a really fun project, and I am super pleased with the way it turned out. I love that we can quickly update the menu, and I think it looks nice too!
Here’s a photo of the finished menu board on the donated TV:
